Pneusil tyre repair kit 45 pieces
For detailed information, other images and documents, please select individual articles from the following table.


Exclusively for trade customers
Register now and access more than 60,000 products
Variants
Exclusively for trade customers
Register now and access more than 60,000 products
Call customer service: +43 50 8242 0
Prices for customers after login
Instructions
Step-by-step instructions:
1. Locating and marking the puncture
- Park the vehicle safely
- Locate the puncture (e.g. using soapy water or by visual inspection)
- Mark the position
2. Preparing the puncture
- Remove the foreign object (nail, screw etc.)
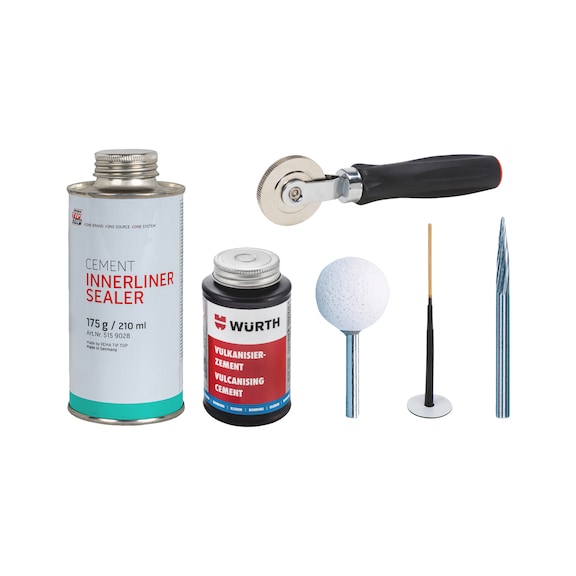
- Use the reamer or milling cutter to clean and roughen the hole. This improves the adhesion of the repair material
3. Inserting the mushroom plug
- Apply vulcanising cement to the mushroom plug and pre-treated area on the tyre
- Observe a flash-off time of 3-5 minutes after applying the vulcanising cement
- Guide the mushroom plug through the hole from the inside out
- Pull the mushroom plug through until the head is against the inside of the tyre
- Use the roller to press the mushroom plug onto the damaged area and roll over evenly
- Apply the Innerliner Sealer to the roughened, visible area evenly using a brush to form a reliable seal
4. Cutting off the protruding part
- Cut off the protruding part of the mushroom plug so that it is flush with the tyre surface
5. Curing and inspection
- Allow the vulcanising cement to cure for a few minutes
- Fill the tyre to the recommended pressure
- Check the tyre for leaks (e.g. using soapy water)
- Tyre can be fully loaded after 48-72 hours
Select RAL-colour code
!! NOTE: On-screen visualisation of the colour differs from real colour shade!!